
You might have wondered how to operate a wooden lathe you bought recently. These are some helpful tips to help get you started. You should keep your jewelry and clothing off the work surface of the lathe. Don't wear long hair. The cutting tool will cut through your hair. Make sure to rotate the headstock prior to turning the lathe on. Also, make sure that the tool post is set as close as possible to the workpiece, and hold the tool securely.
Working with a Tailstock
You can work with a Tailstock in many different ways when operating a wood or metal lathe. First, locate the tailstock in the lathe. Once the tailstock is in place, the cutting tool can be fed through the lead-screw of the tailstock. A Morse taper mounted is also available on the tailstock. If you're attempting heavy work, you'll need to use a lathe dog to stabilize the tailstock.
Next, choose the type of project you would like to work on. A wood lathe will be most useful for smaller projects. You can get familiar with the machine by using a small piece or stock, and learning how to use it. Once you've mastered the basics, you can move onto larger and more challenging pieces.
Getting comfortable with the spindle
Getting comfortable with the spindle is a fundamental skill you should develop when operating a wood lathe. Make sure your work piece is aligned between the lathe's center lines. This is done by making sure the wood is not below the headstock spindle or inside the spur. This will help to ensure that the wood is not damaged.
Once you have found the center position for your workpiece then you can turn the wooden at the desired speed. To achieve the desired effect you will need adjust the speed of the spindle. You should also ensure that the workpiece is securely held between the tail stock and center. Make sure the tool rest is properly leveled and high enough to slice the wood from above the center. Remove the toolrest from the spindle and sand the workpiece before using it.
Get an idea of how the speed control works
A wood lathe can be difficult to use if you don't know how it works. Whether you're looking to turn bowls or baseball bats, you'll want to get a feel for the speed control's range before you start experimenting with it. Wood lathes may be dangerous so make sure to remove jewelry and loose clothes before you begin operating them.
To get an idea of how speed control works, turn small objects smaller than the headstock spindle. Avoid turning large objects, as they could interfere with the bed. By practicing turning various shapes and sizes, you'll quickly become adept at using the lathe. Also, you'll learn the basics of speed control and what parts are sensitive.
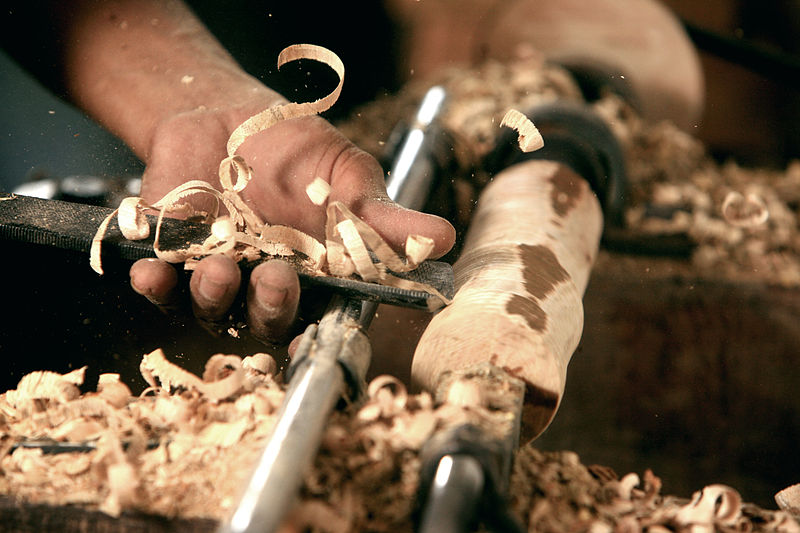
Creating a smooth turn
The right tool is key to smooth turning a wood-lathered workpiece. A gouge can be used on the turning lathe to cut a square piece of wood. A gouge features a U-shaped or C-shaped cutting tip and can quickly remove large chunks of wood. To cut in tighter areas, many gouges have a turn on the edge. When working with a wooden lathe, many woodworkers will use a variety of sizes gouges.
Before you begin to turn, measure the diameter of your piece. You can measure the workpiece's diameter with a caliper. Make frequent checks of the diameter to make sure the diameter is correct. Once you are happy with the diameter, remove your workpiece from the lathe. You can remove any pieces that connect the workpiece to your lathe by cutting these pieces.
Find the perfect lathe
You will find many different types of wood turning lathes on market. The smallest wood lathes are called mini wood lats. These lathes are portable and can be used for small woodworking projects. Midi wood lathes are stationary but may have wheels to make them more portable. Full-sized lathes are the largest. They were once used only by professional woodworkers. However, they are very popular with woodworkers of all levels.
You should first read the instruction manual before you use your new tool. You can feel the resistance when you first start using the wood lathe. After mastering this function, you will be able to move up to a faster speed setting. Your operating manual for a wood turning lathe is the most important guide. Please read carefully and take note as you use it.
FAQ
How can a woodworker start making money?
Many people are looking to create their own furniture and start an internet business. However, if you're just getting into furniture building, there are other options than selling on Etsy. Local craft fairs and events are great places to sell your products. Offering workshops could be another option for those who are interested in learning how to build their furniture. If you have the experience to be a carpenter, builder, or a designer, you may consider offering your services in remodeling homes or creating custom pieces.
Where can I find free woodworking plan?
To find free woodworking plans, you don't have to buy any magazines or books. All you need to do is search Google. Just enter "free woodworking" into the search bar, and you'll see hundreds of websites where you can download free plans.
What is the minimum amount I will need to start?
There are no exact numbers because every project is different. These factors will help you get an estimate of how much money is needed.
-
Cost of materials
-
Tools and equipment
-
The time spent on the project
-
Hourly rate
-
What amount of profit can you expect to make?
-
No matter if you are looking to hire someone
It's a good idea for beginners to start with small projects like frames and boxes. You'll become more proficient as you get experience.
How much should a Woodworker Charge per Hour?
The hourly rate of a professional woodworker depends on many factors including experience, skill level, availability, location, etc.
The hourly average rate for skilled woodworkers runs between $20-$50.
An hourly rate of $10 for a less skilled woodworker could be possible.
What kinds of woods are good for making furniture?
Woods are classified by their hardness. Softwoods include cedar and pine as well as cedar and cedar. Because they are resistant, they can be used for outdoor furniture. These hardwoods include maple, mahogany and teak. Because they can't weather outside, they're usually used indoors.
Statistics
- Overall employment of woodworkers is projected to grow 8 percent from 2020 to 2030, about as fast as the average for all occupations. (bls.gov)
- In 2014, there were just over 237,000 jobs for all woodworkers, with other wood product manufacturing employing 23 percent; wood kitchen cabinets and countertop manufacturing employing 21 percent. (theartcareerproject.com)
- Most woodworkers agree that lumber moisture needs to be under 10% for building furniture. (woodandshop.com)
- If your lumber isn't as dry as you would like when you purchase it (over 22% in Glen Huey's opinion…probably over 10-15% in my opinion), then it's a good idea to let it acclimate to your workshop for a couple of weeks. (woodandshop.com)
External Links
How To
How to join wood with no nails
Many people love woodworking. It's fun and relaxing because you can use your hands to make something useful from wood. You may need to join two pieces without the use of nails. This article will explain how to do this so that your woodwork projects stay beautiful.
First, remove any sharp edges from the wood pieces before you join them. Avoid leaving sharp edges that could lead to problems later. Now it's time to start glueing your boards together.
You should only glue one side of hardwood. If you are using softwoods such pine or cedar, glue should only be applied to one side. Once you have applied the glue, press down on the boards until they are fully attached. Be sure to let the glue dry before you move on to the next step.
After you've glued your boards, you'll want to drill holes into the joints where you plan to insert screws. You can choose the type of screw to determine the size of your holes. For example, if you intend to use 1/2-inch wood screws, you need to drill a hole that is at most 3/4 inches deep.
After drilling the holes, you can drive the screws into your board's backside. Avoid hitting the board's top surface. Otherwise, you could ruin the finish. Try to not hit the ends of the screws when driving the screws. This will prevent splitting the wood's end grain.
Now that your project is finished, you'll want to protect it from the elements. To do this, you can seal the entire furniture piece or just cover the top. You want it to last years, so you can use any product. There are many options: oil-based varnishes; polyurethane; shellac; lacquer.
These products can generally be found in any home improvement shop. You should make sure you are getting the right type for the job. Some finishes are toxic and should not ever be used indoors. Protective gear should always be worn when handling these finishes.