There are many different ways to carve an gnome. Before you begin carving, here are some key points to keep in mind. The carving process is enjoyable and rewarding. You will need to layer several layers to complete this project. It is also a great opportunity to learn how you can carve a gnome. You can also add creativity to your gnome-carving. Here are three ways to carve a gnome from wood.
Freehand carving a gnome
If you are trying to freehand carve a gnome for a Christmas ornament, here are some tips for success. Although you can carve a gnome with a knife, it's possible to use a micro V-tool to create fine details on the hat rim and beard. A gnome, while a simple project to carve, can be accomplished in your spare moments.
The gnome is a great way to test your skill in freehand carving. They were once common garden ornaments, and are even still popular in many countries. Carving a gnome from wood is a great way to gauge your skill and see where you need to improve. This will be a good way to measure your design, detail, depth and design. Once you've mastered the gnome drawing, you can move on to sculpting his features.
Whistle carving is a must-try project for every woodcarver
The whistle is an excellent project for woodcarvers. A whistle, which is simple and functional, can be fun to carve. It's also a great way to introduce people to the craft. To make your whistle a useful piece, you need to know the steps. This tutorial will show you how to carve a whistle from the beginning to the end.
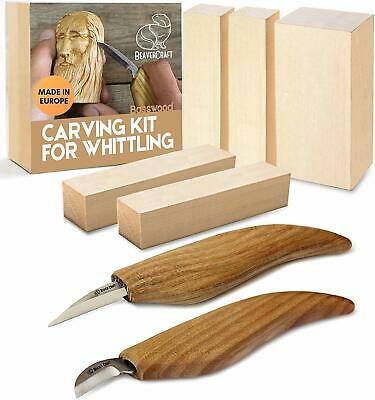
To start the project, you'll first need a straight edged knife and nontoxic oil. Although carving a wooden gnome can seem daunting, this is a very simple project that will improve your woodcarving abilities and provide a great outlet for creativity. This is a great project for beginners, and you can practice many woodcarving skills.
Creativity in gnome carvings

You can easily add creativity to your gnome carvings by adding a colorful cap. A wood-carved wooden gnome might be a whimsical decoration. But a sneering, angry troll could make your heart melt. Gnomes are an excellent way to add personality to your garden, and this can be done with various materials, such as wood, stone, and stone.
Making a gnome from wood
Before carving a gnome of wood, it is important to first determine the size of the block. Drawing the anatomy of your gnome will be easy. It will include the face, body as well as the feet, belt and hat. To create smooth corners on the face, make a V cut in some areas. Using a chisel or knife, make V-cuts in the appropriate places. Then, using a micro V-tool, cut out a piece of wood about 1.5mm thick. This will give you an elegant curved edge to finish your beard and hat.
A gnome carving project is very beginner-friendly. You have the potential to produce excellent work. You can expect to make progress at each step by carving a gnome every other week. This may not be possible with every project. However, weekly carving progress will enable you to see significant improvements in design shape and facial features.
Add a gnome in a world full of gnomes
Gnomes Of The Underdark and other RPGs have a common character: David. This character is not crazy. Telepathy, Can't argue with Elves and Fluent Animal are just a few of the traits he has. He is known for putting up road signs that cause people to be confused. David and Lisa may even have a rivalry going.
Gnomes are powerful casters and very skilled at using arcana. In addition to this, they're the only playable race in the game. Other gnomes like the undead or leper gnomes share the same animation. Kirin Tor has been home to gnomes since the beginning. Meryl Felstorm was their founding member. He had a gnome to his credit.
FAQ
What is the difference between plywood and particle board?
Plywood can be described as a mixture of layers and wood that have been pressed together with pressure. Plywood comes in several thicknesses and is commonly used for cabinets and flooring. Particle board is made from sawdust mixed with resin and then compressed into large blocks. It is used primarily for home improvements. Both types of boards are durable and easy to cut.
How long does it take you to finish a piece?
It depends on the size of the piece of furniture. Smaller projects like boxes and picture frames can be finished within one day. Larger projects, such as desks and dining tables, can take several days. It takes time for the wood to be stained and sealed properly.
How long does a piece take to finish?
It depends on which wood you choose, how complicated your design is and what amount of finishing you apply. Hardwoods are more difficult to maintain than softwoods. Hardwoods can also be more costly than softwoods. They are more durable and can withstand moisture better. The process of finishing a piece of furniture typically takes anywhere from one week to three months.
Where can I buy hardwood lumber?
You can buy hardwood lumber at Home Depot. They carry a variety of wood products such as flooring, cabinets, and furniture.
They also have an extensive selection of engineered hardwoods such as Ipe (Araucaria Angustifolia), Brazilian Cherry (Pau d'Arco), and Mahogany (Swietenia Macrophylla).
You can find these woods for sale online by searching "hardwood lumber" on Google.
Statistics
- Most woodworkers agree that lumber moisture needs to be under 10% for building furniture. (woodandshop.com)
- Overall employment of woodworkers is projected to grow 8 percent from 2020 to 2030, about as fast as the average for all occupations. (bls.gov)
- The U.S. Bureau of Labor Statistics (BLS) estimates that the number of jobs for woodworkers will decline by 4% between 2019 and 2029. (indeed.com)
- Average lumber prices rose about 600 percent between April 2020 and May 2021. (familyhandyman.com)
External Links
How To
How to use a handsaw correctly
Hand saws are used for cutting wood into pieces. There are many types of handsaws: jigsaws and table saws; band saws; sabersaws; crosscut saws; miter saws; and rip-saws. A hand saw is made from metal or plastic and cuts materials such as wood, plastics and metals.
Hand saws have the main advantage of cutting at precise angles without needing to adjust the blade. It's also much easier to sharpen them than power tools. However, they do have some disadvantages. These devices are bulky and heavy so you need to be careful when transporting. If you are not familiar with how to use one you may injure yourself.
There are many different ways to hold a hand saw. You should always keep your hands far away from the blades while cutting. If you don't, you might get hurt. You should hold the saw with your fingers close to the handle. Your thumb should be at the top of your blade. This will prevent you from accidentally touching the blade.
When using a hand saw, you should never put anything under the piece of wood you're cutting. The blade could slip if you do this. Before you start cutting, ensure that you inspect the area. Ensure no nails, screws, or other objects are underneath the wood.
You should always wear safety goggles when working with a hand saw. Safety glasses protect your eyes from dust and make it easier to see what the hand saw is doing. Safety glasses also protect your eyes from flying debris.
Before you start working with a saw, it is important to learn how to use it safely. Then, practice until you feel confident enough to start cutting things. Once you've mastered the basics, you'll find that you can easily cut almost anything!