
A lidded box requires that you square the sides and perimeter of your box. The lid and box are typically cut from the same 2-in thick block of seasoned wood. First, place a flat foot on the one side of your wood. You will need to recess the center of the base a little so that the final box can sit on it. You can use a small scraper or a knife to make the recess.
Problems with hollowing end grain inside lidded boxes
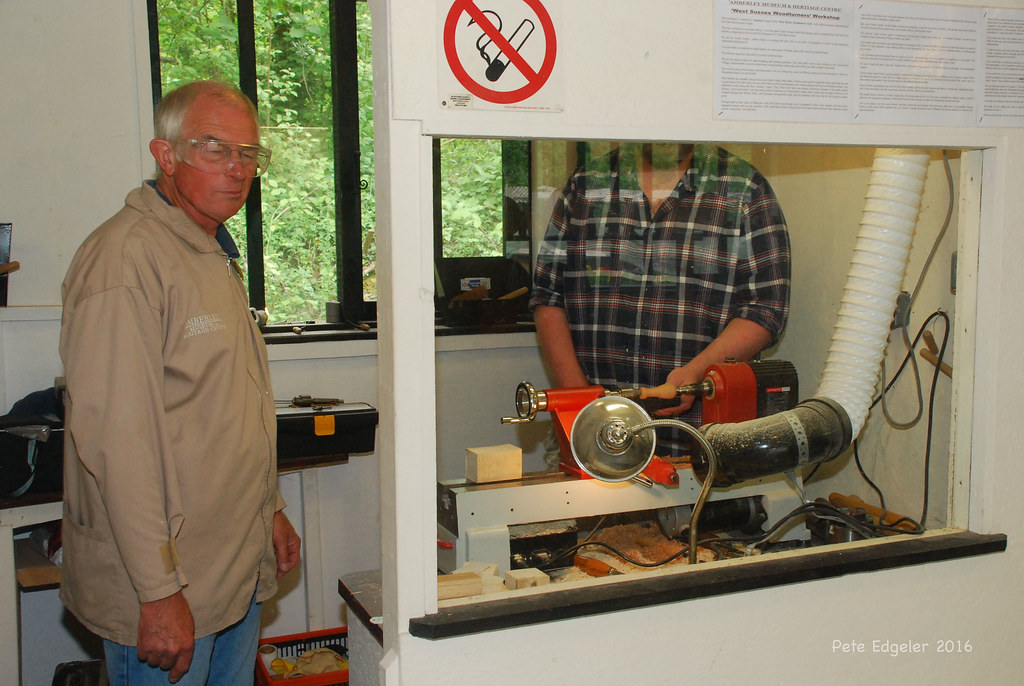
The hollowing of end grain is a common challenge when box-making. This process is difficult and involves specialist tools. You might be able make a basic hollowing device for as low as $30 by grinding an old screwdriver. A gouge can be purchased and used for this purpose. The key to hollowing end grain is to avoid using sharp edges. A gouge should have a flat, long bevel with a round fingernail shape.
The biggest challenge in hollowing end grains is that they are five times more difficult to hollow than side grains. It can also easily tear out. Experiential bowl turners can have problems hollowing end grain. Although this can help to overcome the problem, you should know that special end-grain tools are often required for lidded box.
How to make a snap-fit lidded container
A snap-fit lidded cardboard is a type container with a sliding closing. These boxes contain liquids and other liquid-filled containers. These boxes are simple to assemble and disassemble. They can also be automated for lower assembly costs. There are many types available. Therefore, engineers should select the best snap-fits based on their cost, strength, failure rate, and other factors. This article will provide an overview of all types of snap-fits.
The upper portion of a 3-D printed snap-fit lidded cardboard box should be designed with the correct measurements. The upper should be flush with the base. The lid should remain in place. The lid should snap in place. Wood removal should be done slowly. This process may be tricky but is worth the effort.
Wooden lidded box
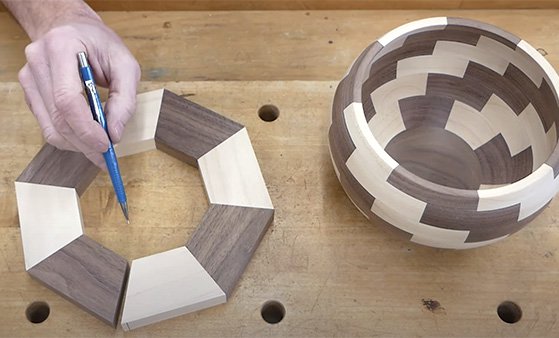
Most of the woods used for lidded box construction are salvaged from trees. After the tree has been cut, it is dried to prevent cracks. The wood undergoes another drying process, which makes it shrink. The lidded box can be made of various types of wood, depending on the style. Generally, a lid is made of two pieces - one is smaller than the other.
Turning small circular containers with lids on a lathe made them into small containers. Boxwood, a slow growing tree with a fine grain and thin sections, is the most common wood used by a turner. This wood was especially good for creating fine features due to its close spacing. It was used regularly to make double-sided combs, which were made from this wood. The boxwood used in the making of lid boxes was also known by the name pyxides.
The size of the lidded container
The type and size of wood used determines how large a lidded wooden box will be. Maple and cherry are the most common woods used. These two wood types make great boxes because they have different shrinkage rates. A quality box should have a minimum of three inches square and a maximum length of five to six feet. You should ensure that the wood you use for your box is dry. Exotic woods are an option for a visually appealing lid. But you need to be well-versed in the process.
Preparing the wood is an important step. A thin chamfer is necessary to make the bottom of the box smooth and rounded. Make a V-shaped cutting at the joint. Once you're satisfied with the design, you can use the spindle-roughing touge to finish shaping and finishing the rest. Before you begin carving the lid use a dividing tool to mark where the bottom is. Next, use a skew to chamfer the base of the lid. This will soften the corner, concealing a slight circularity at base/lid joint.
FAQ
Where can you find free woodworking blueprints?
You don't need to purchase any books or magazines to find free woodworking plans. You just need to search Google. Simply type "free woodworking” into the search box and you'll find hundreds of websites that offer free plans.
What is the difference between a hobbyist woodworker and a professional woodworker.
Hobbyists enjoy creating things out of wood. Professionals tend to focus on the quality. Hobbyists tend to take pride and share their creations with family and friends. Before they start working on a project, professionals will spend hours researching the designs. They'll be meticulous about every aspect of their work, from choosing the best materials to finishing it perfectly.
Can this be a way to make money?
Yes! Many woodworkers are already doing so. According to the U.S. Bureau of Labor Statistics in May 2012, the median annual income for woodworkers was $34,000 This is more than the national average of 31,000 per annum.
Where do I get my woodworking supplies?
There are many places that you can find all the information you need. You can visit your local hardware stores, or you can look online at sites like Amazon.com.
You might also consider flea markets and garage sale for any old furniture or other materials you could reuse.
Are you a genius in order to master woodworking?
No. Woodworking does not require any special skills. You can create beautiful pieces of art by learning how to use simple power tools.
What would you recommend as a starting material for woodworking?
You can start with softwoods like pine or poplar. After you are comfortable with the softwoods, move to hardwood.
How much should a woodworker charge per hour?
Hourly rates for professional woodworkers vary depending on many factors such as skill, experience, availability, geographical location, and other variables.
The hourly average rate for skilled woodworkers runs between $20-$50.
A less skilled woodworker can charge as low at $10 an hour.
Statistics
- If your lumber isn't as dry as you would like when you purchase it (over 22% in Glen Huey's opinion…probably over 10-15% in my opinion), then it's a good idea to let it acclimate to your workshop for a couple of weeks. (woodandshop.com)
- Most woodworkers agree that lumber moisture needs to be under 10% for building furniture. (woodandshop.com)
- Woodworkers on the lower end of that spectrum, the bottom 10% to be exact, make roughly $24,000 a year, while the top 10% makes $108,000. (zippia.com)
- In 2014, there were just over 237,000 jobs for all woodworkers, with other wood product manufacturing employing 23 percent; wood kitchen cabinets and countertop manufacturing employing 21 percent. (theartcareerproject.com)
External Links
How To
Here are some tips on how to drive nails in wood
When driving a nail into wood, it is important to first choose the correct size and kind of hammer. There are many types of hammers that you will find: claw hammers and sledgehammers; mallets; ball peen hammers; and hatchets. Each type has its strengths and weaknesses. For example, a claw hammer works best when you want to hit something hard, like nails; however, it's difficult to control precisely where the blow lands. The sledgehammer works well for large areas, but is too heavy for smaller tasks.
Once you have chosen the right hammer for you, put your hand flat against its side so that it rests comfortably in the palm of your hand. Take the handle and hold it with both hands. But don't press down so hard you injure yourself. You should hold the hammer straight-up, with your wrist still relaxed. Next, swing the hammer toward the ground and aim for the nail's center. You should feel the impact of your hammer hitting the nail. Practice swinging your hammer on a block of wooden until you feel comfortable.
Once you are ready to drive the nail, place the hammer close to your body. Place the nail so that it is perpendicular with the wood's surface. Keep your eyes focused directly on the tip of the nail. Swing the hammer forward, and then move the hammerhead. Continue this motion several times, slowly increasing the speed of each swing. Once you've mastered the technique, try adding power to your swings. Then, raise the hammer from your shoulder to bring it down. This will allow you to exert more energy.
Once you have made the first hole, remove your hammer. You can then remove the rest of the nails using a prybar or a screwdriver. You should ensure that the nails are flush with the board's surface to avoid splitting the wood.