
This guide will help you make intarsia art from wood. The information presented here covers Wood types, Patterns, Tools, and Techniques. Read on to learn more about this exciting craft. Depending on how skilled you are, you might be interested in working with a different variety of wood. If you're new to this craft, you can start by making a sample piece to get a feel for the process.
Patterns
If you are an experienced woodworker, you will be able to make a wide variety of intarsia designs, including tree ornaments, holiday ornaments, and flowers. The intarsia wooden patterns included in this book can be used by all levels of woodworkers and show the artistry that the process requires. There are a total of 21 full-size intarsia patterns included, with helpful information on blades, wood, and shaping.
Using contrasting wood species, intarsia is an exciting and original way to build a piece of furniture or an artistic wall hanging. It's like building an intricate puzzle by placing different pieces of wood next to each others. The wood is then polished or stained, and each piece is assembled to create a unique design that adds depth and character to the finished project. Intarsia wood patterns can be extremely challenging to make, so finding a good source of free intarsia patterns will help you make the right decisions for your project.
Tools
To create the best intarsia, you will need to use special tools for intarsia wood. A belt sander can be used to quickly remove material and smoothen edges. A dremel/flex shaft is a useful tool for shaping or sanding fine details. You can use these tools to create small areas or shape them with different tools.
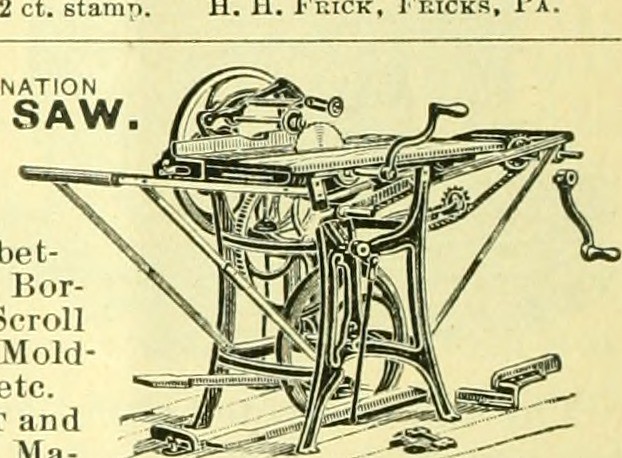
Jigsaws: Jigsaws are great at cutting wood, but they cannot do the intricate cuts that scrollsaws can. Sanders are required to smoothen wood surfaces. Intarsia woodworking uses two types of wood. These woods must be different in color and grain. The wood can then get stained differently. After the wood has been cut, it is sanded to form a mosaic-like pattern.
Techniques
Amazing intarsia creations are not difficult if you follow the right steps. A pattern is a great starting point for your artistic creativity. These ideas will get you on your way towards creating stunning intarsia wood art. These are some of the techniques you can use:
First, pick the project design. Keep extra copies of your template. Next, choose the species of wood you're going to use. Different species of wood can have unique characteristics. Roughing out the thickness of each piece of wood gives your project a more interesting depth and dimension. You can also add parts to your project by gluing additional layers. Finish your project by removing any backing material and leaving the intarsia piece as it is.
Woods for use
Whether you're a beginner or have been working with inlaid wood for years, this new book will give you the tools and techniques to make beautiful pieces that stand out. Kathy's progressive teaching style will help you learn everything, from the basics to the subtleties of color breaks. This book will be an invaluable resource for anyone who is interested in learning more about this fascinating craft, even if they have never attempted it before.
First, select woods that will complement each other and have the same grain orientation. For example, a Teddy will require 20 pieces of wood from four different wood types with different grain orientations. You will need a saw that has a fast blade. Once you have established the wood's color and orientation, it's time to start cutting and staining.
Colors

Intarsia is as diverse as the wood itself. Saps are white while heartwoods can be reddish brown, gray black or grayish. Cherry, for example, is one of the woods that will darken over time. Cherry has a light to medium tone at first and then becomes darker with age when exposed to sunlight. Other woods, like cedar, have varying tones within a board. This helps to create depth to your project.
Intarsia can be described as a form of art that involves gluing different pieces of wood together to make patterns. It originated in the Islamic world, but today is often associated with Italy. To create three-dimensional effects, woodworkers use different colors of wood with different thicknesses. Intarsia is often used on jewelry boxes as well as wooden chests and keepake boxes.
Time-consuming process
Intarsia involves complex techniques and different wood types. Artists need to collect different types wood and stains to make beautiful intarsia patterns. Although plywood and Birch are the most popular types of wood, other types of wood are suitable. Artists choose the wood they prefer, but it all depends on their individual preferences. Many craftsmen prefer Western Red Cedar to create intarsia projects.
Intarsia woodworking starts with cutting and labeling the inlay. Then, the artist fuses the pieces together using adhesive or glue. After the glue dries, the woodworker finishes off the piece using a double bevel edge inlay. This time-consuming process requires a great deal of skill, and the finished product is truly a work of art.
FAQ
How much money will I need to get started?
Each project is unique so there aren’t exact numbers. These are the factors that will give you an idea of how much you'll need.
-
Materials cost
-
Tools and equipment
-
Time spent working on this project
-
Your hourly rate
-
What profit are you expecting to earn?
-
Hire help
If you're just starting out, you may decide to start small by making simple items such as boxes and picture frames. As you gain experience, you'll be able to tackle more complex projects.
Is it possible to refinish your own furniture?
Yes! There are plenty of ways to refinish old pieces of furniture without having to pay a pro. Here are some suggestions:
To remove stains and scratches, use sandpaper. Next, wipe the surface clean with a damp cloth.
Apply clear polyurethane finish. Before moving furniture, let dry completely.
Paint furniture with acrylic paint.
Stain can be used instead of paint. The stain will give the furniture a rich look.
Use shellac wax. Wax will protect the wood and add shine.
What is the difference between plywood and particle board?
Plywood is a combination of layers of wood, which are then pressed together under high pressure. Plywood can come in many thicknesses and is used for flooring and cabinets. Particle board can be made from sawdust, resin, and then compressed to make large blocks. It's often used for home renovation projects. Both boards can be cut easily and are both durable.
How often should I purchase new supplies?
You'll probably have to replace some of your tools over time. If you're using hand tools, you'll need to sharpen them regularly. You'll also need to replace parts if you use power tools. Avoid buying too many products at once. Spread your purchases out over several months.
How can you calculate the woodworking price?
The most important thing to remember when calculating costs for any project is to keep them as low as possible. Always make sure you get the best price on materials. You should also consider other factors that could impact the cost of your project, such as experience, skill level, time, and money. You can find an estimate of the cost of different woodwork projects in our guide to common DIY tasks.
How do I get started as a woodworker?
Woodworking is an art. It requires patience. It takes time and practice to master the various techniques and tools required for woodworking.
There are many woodworking tools on the current market. Some people prefer using power tools while others prefer hand tools.
The choice is yours, but you must ensure you choose the right tool for the job. If you don't have any experience, you may consider starting with a basic set of hand tools.
A router is a tool that cuts intricate shapes in wood. You can also learn how to use it. These are available at most hardware stores.
Statistics
- Overall employment of woodworkers is projected to grow 8 percent from 2020 to 2030, about as fast as the average for all occupations. (bls.gov)
- If your lumber isn't as dry as you would like when you purchase it (over 22% in Glen Huey's opinion…probably over 10-15% in my opinion), then it's a good idea to let it acclimate to your workshop for a couple of weeks. (woodandshop.com)
- In 2014, there were just over 237,000 jobs for all woodworkers, with other wood product manufacturing employing 23 percent; wood kitchen cabinets and countertop manufacturing employing 21 percent. (theartcareerproject.com)
- Most woodworkers agree that lumber moisture needs to be under 10% for building furniture. (woodandshop.com)
External Links
How To
How to stain wooden surfaces
Staining wood can be described as a process where chemicals are applied to the wood surface. This causes the wood to take on a new color. This chemical reaction causes wood to turn from whiteish to brownish. Oak is the most common wood type for staining. However, you can also use other wood types.
There are many options for applying stains to wood surfaces. One method involves mixing the stain and a solvent and then spraying it on the wood. You can also apply a solution containing water and dye directly to the wooden surface. Stains can also be mixed into paints and varnishes, becoming part of the finish coating.
The first step in staining wood is preparing the surface. You must clean the wood well to remove any grease or dirt that might interfere with the application of the stain. Sanding the wood smooths out rough spots and scratches. You must then decide on the type of stain that you wish to use. There are two main types of stain: non-penetrating and penetrating. Penetrating stains penetrate deeper into the wood than non-penetrating ones, making them ideal for dark colors such as mahogany. Penetrating stains are best paired with lighter colors, such as maple.
After deciding on the type of stain, you want to apply, prepare your tools. You can use a paintbrush to apply stains. This allows you spread the liquid evenly over the surface. After you're done painting, make sure to have some rags handy to remove any excess stain. You should have enough containers to store the various components of the stain mixture if you intend to mix it yourself.
Once you have prepared all your materials, it is time to clean the areas where you will stain the wood. Use soap and warm water to remove dust and grime. Wipe down all furniture pieces with a dampened cloth and clean water. Take care to remove all debris and dirt, especially if you are planning on staining darker wood.
Apply the stain. Next, apply the stain to the furniture by starting at one end. Move slowly and carefully along the grain of your wood until you reach its opposite end. Be careful not to let the stain drip off the wood's edge. Before moving on to the next steps, allow the stain drying completely.
To protect the painted surface, apply a coat of clear polyurethane sealant. Three coats are recommended for polyurethane. Let the third coat dry overnight before you sand the final coat.