
You've likely tried chip carving before and it's not an easy task. There are many techniques and styles that you could try. But which one should you choose? What tools are you going to need? Here are my tips and tricks to carve chips. I hope this helps you decide what one is best for you. There are many essentials to chip carving success, regardless of whether you prefer traditional or modern style.
Traditional
Chip carving is one form of decorative woodcarving that dates back to the beginning. It requires a straight-edged knife but a skew-ground or offset blade knife can also be used. Chip carving is a technique that involves making small, triangular incisions into wood in order to create a pattern. This art form was developed simultaneously in several countries and dates back over 1000 years. Due to its popularity, many of the designs were so similar across cultures that it was hard to distinguish one from the other.
The skills needed to carve wood became more popular as the practice spread around the globe. In Sweden, chip carving was a common way to decorate furniture and eventually schools were established to teach the art. Modern chip carvers are able to benefit from the centuries-old skills and knowledge of carvers. Through generations, the knowledge and experience of carvers was passed on from apprentice to student. It's an ongoing process that lasts for a lifetime.
Formulary free
This DVD will teach you how to chip carve. A DVD by Murray Taylor shows you how to create freeform and geometric carvings. It's an excellent introduction project that contains lots of information. English and NTSC versions of the DVD are available. You can also purchase the DVD in stereo and widescreen. Artisan Media Ltd. owns the DVD and it's available in MP4 for Windows and Mac computers.
Triangles, circles, lines and lines are the fundamental shapes for geometric chip carving. The technique allows for unlimited shapes and patterns and can be used to combine different styles. This technique is also known by the free-form style of chip carving. Regardless of whether you want your chips to be a flower or a dragon, it will be a wonderful addition to any room. A free-form method of chip carving is a great way to incorporate several different techniques into one piece.
Techniques
Chip carving has been practiced for hundreds of years. There are many examples all over the world. On paddles used for ceremonial purposes and boats in the South Pacific Islands, one example of chip-carving is found. Although most of these carvings were done with bits of bone or seashells, some have also reported using shark teeth. This book will show you how to create amazing designs by using different chip carving techniques.
It is simple to carve chips if you follow a few basic techniques. The first step is to learn how you can carve the fine triangle. This pattern is easy to understand and easy to execute. To carve this design, simply carve different triangles and do it again. This does not mean your chip carving should be dull. You can make a variety of patterns by changing the triangles.
Tools
Lora S. Irish's free online seminar will show you how to chip carve basic steps. She teaches you how to use various carving tools and supplies, including a chip knife, stab knife, and detail bench knife. Irish also teaches you how to use different wood carving tools during this seminar. The list below will help you choose the right tool to suit your carving needs. These tools can be used to create simple designs and shapes, or more complex designs.
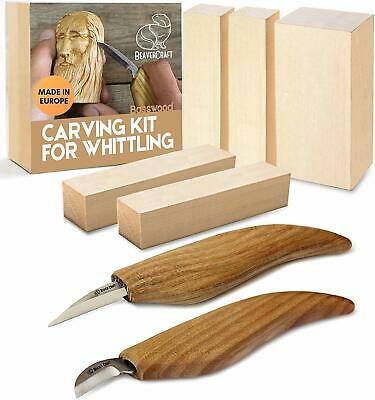
Special geometry is required for chip carving knives. It is about one half inch long and has a narrow, curved back edge. This allows you to make precise incisions. To ensure perfect edges, it is crucial to choose a sharp, pointed point. You can also get chip carving knives made out of stainless steel. They have a sharp tip. A chip carving knife should be sharp and sharp enough to slice a bit of wood.
Getting started
When getting started with chip carving, you must first learn about its methodology. This process varies based on the type of carving that you intend to do. However, these principles will help you ensure your work is accurate. The method of chip carving involves cutting a fine pattern in the wood. Follow these steps for your first chip carving:
When using a chip carving knife, it is essential to sharpen it well. The blade of the chip carving knife will have bevels on each side, indicating that it is a primary chip carving knife. The sharpening stones are shaped like diamonds and can create efficient edges. It should be placed at a 10-degree angle. It will also sharpen your chip carving knife as well as your chip carving tool simultaneously.
FAQ
How can a novice woodworker make it big?
Many people are looking to create their own furniture and start an internet business. There are other ways to make money if you're just starting out building furniture than selling on Etsy. Sell at craft fairs or other local events. You could also offer workshops to help others learn how to make their own furniture. You might be able to offer services like remodeling homes or making custom pieces for clients if you are a skilled carpenter.
Where can I buy hardwood lumber?
You can buy hardwood lumber at Home Depot. They sell all kinds of wood products, including flooring, cabinets, furniture, etc.
A wide range of engineered hardwoods are also available, such as Ipe and Brazilian Cherry (Pau d'Arco), Mahogany and Swietenia Macrophylla.
These woods can also be purchased online by simply searching Google for "hardwood timber"
Can you teach yourself woodworking?
Learning by doing is the best way of learning anything. Woodworking requires patience, practice and skill. It takes time to master any craft.
It is the best way to learn to do something is to actually do it. Start small and use what you learn.
How much money will I need to get started?
There are no exact numbers because every project is different. Consider these factors if you need to estimate the amount of money that you will require.
-
Material costs
-
Tools and equipment
-
Time spent on the Project
-
Hourly rate
-
What is your expectation for profit?
-
No matter if you are looking to hire someone
It's a good idea for beginners to start with small projects like frames and boxes. As you gain experience, more difficult projects will become possible.
What is the difference in plywood and particleboard?
Plywood is made up of layers of wood pressed together under pressure. Plywood comes with a range of thicknesses, and it is most commonly used for flooring and cabinets. Particle board can be made from sawdust, resin, and then compressed to make large blocks. This board is commonly used in home improvement projects. Both types of boards can be easily cut and are durable.
How do I know what tools are best suited for me?
It's important to consider your preferences and needs when buying tools. Do you prefer metal or plastic handles? What size screws and nails do you use most often? Are you more comfortable using power tools than hand tools?
Statistics
- Woodworkers on the lower end of that spectrum, the bottom 10% to be exact, make roughly $24,000 a year, while the top 10% makes $108,000. (zippia.com)
- In 2014, there were just over 237,000 jobs for all woodworkers, with other wood product manufacturing employing 23 percent; wood kitchen cabinets and countertop manufacturing employing 21 percent. (theartcareerproject.com)
- The best-paid 10 percent make $76,000, while the lowest-paid 10 percent make $34,000. (zippia.com)
- Overall employment of woodworkers is projected to grow 8 percent from 2020 to 2030, about as fast as the average for all occupations. (bls.gov)
External Links
How To
How to stain hardwood
Stain wood is a process that involves applying chemicals to the surface of wood, which changes its color. This chemical reaction causes the wood color to change from white and brownish red. Oak is the most common wood type for staining. However, you can also use other wood types.
You can apply wood stains in many different ways. Some methods involve mixing the stain with a solvent (such as turpentine) and then brushing or spraying the mixture onto the wood. Others use a solution made up of water and dye, which is then applied directly onto the wood. You can also mix stains with varnishes or paints so that they become part the finish coating.
The first step in staining wood is preparing the surface. The wood must be thoroughly cleaned to remove all grease and dirt. Sanding can smoothen out scratches and uneven spots. Next, you need to decide which stain you want. There are two types of stains that can be used: penetrating and non-penetrating. Penetrating stains penetrate deeper into the wood than non-penetrating ones, making them ideal for dark colors such as mahogany. Penetrating stains are best paired with lighter colors, such as maple.
After you've decided what type of stain to apply, get ready for your tools. You can use a paintbrush to apply stains. This allows you spread the liquid evenly over the surface. You should also have some handy rags to wipe up excess stains after you finish painting. If you plan to mix the stain yourself, make sure you have enough containers available to hold the different components of the mixture.
Once you have prepared your materials, start by cleaning the area where you plan to stain the wood. Clean the area with soap and warm water to get rid of dirt and grime. Wipe down all furniture pieces with a dampened cloth and clean water. You should remove any debris, especially if your plan is to stain darker wood.
The stain should be applied next. Start at one end of the piece of furniture and brush or spray the stain onto the wood. Move slowly and carefully along the grain of your wood until you reach its opposite end. Make sure that the stain does not drip off the edge of the wood. Before proceeding to the next step, let the stain dry thoroughly.
Apply a clear polyurethane sealant to protect the painted surface. Apply three coats of polyurethane sealer. Let the third coat dry overnight before you sand the final coat.