
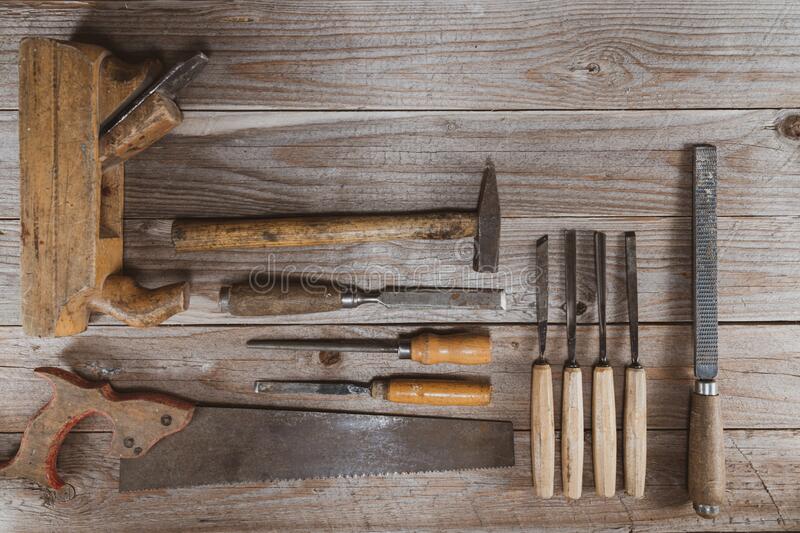
There are a lot of woodworking tools for beginners, but some of them are essential to your project, regardless of the complexity. These tools are necessary for preparing the end, face, and edge grains of a piece. They can also be used to fine tune the fit between two pieces. Below is a list that will help you choose the right tools. This will hopefully help you to get started with woodworking.
Planer
A planer is one of the essential woodworking tools, but many beginners don't own one. There are many options available for budget-friendly models that can do the job just as well. A planer is a better tool than a saw. It can significantly increase your productivity. Learn about some of these tools below. A good planer can save you hours every week! This article will help to decide whether you should invest in one.
Jigsaw
A jigsaw is one of the most commonly used woodworking tools. Its reverse tooth and backer boards, which it has, help keep wood fibers in their place and prevent them becoming brittle. A jigsaw can have two types of blade: a standard blade or a reverse-tooth one. A beginner jigsaw will typically cut on the upstroke.
Clamps
A clamp is an essential tool for any beginner's woodworking shop. While the basics of a clamp are simple, the variety of styles and materials available can be overwhelming. There are three main types: parallel, spring and hand screw clamps. Most projects require at minimum three of these tools. Below is a listing of all three types. A list of the three most commonly used clamps can also be found below.
Combination Square
The combination square is one of the most versatile woodworking tools, with many uses. The head features three ground reference faces as well as a bubble level. This makes it an ideal tool to check the level of your workpiece. You can measure the angle with the handle. You can also use it to measure the level of the surface, which is particularly useful if you're working on something very small.

Jointer
A jointer is an essential tool for woodworkers starting out. Depending on how they're used, a jointer can either be a beginner’s best friend or worst enemy. There are many methods to safely use your jointer. Begin by carefully reading and following the instructions in your jointer's manual. The manual outlines most of the safety precautions. Once you have learned how to use the jointer safely, it will become a useful tool in your workshop.
FAQ
How can I keep my shop organised?
To keep your workshop tidy and organized, you should first create a place for tools storage. You want your tools to stay clean and free from debris and dust. To hang accessories and tools, use pegboard hooks.
What types of woods are best for furniture making?
Woods are classified according to their hardness. Softwoods can be pine, fir or cedar. Because they resist rot, softwoods can be used to make outdoor furniture. You can find hardwoods like oak, maple, mahogany, teak, and others. They are generally indoors as they don't weather well outside.
How much should a skilled woodworker earn per hour?
The hourly rate paid to a professional woodworker is dependent on many factors. These include skill level, availability, and location.
A skilled woodworker can expect an hourly rate of $20-50.
A less skilled woodworker can charge as low at $10 an hour.
This is a job that I can make a living from.
Yes! In fact, many woodworkers already do. According to the U.S. Bureau of Labor Statistics in May 2012, the median annual income for woodworkers was $34,000 This is significantly higher than the national average, which is $31,000 per year.
What's the difference between a hobbyist and a professional woodworker?
Hobbyists enjoy creating things out of wood. Professionals tend to focus on the quality. Hobbyists usually take pride in their creations and often share them with friends and family. Professionals spend hours researching design ideas before starting to work on a project. They will pay attention to every detail, from selecting the best materials to finishing the project perfectly.
How can a beginning woodworker make a living?
Many people are beginning to learn how build furniture to launch an online business. If you are just starting to build furniture, there are many other ways to make money than selling on Etsy. You could also sell at craft fairs, or other local events. Or you could offer workshops for others who want to learn how to build their own furniture. Perhaps you have some experience as a carpenter/builder and would like to offer your services, such as remodeling homes and creating custom pieces.
What material would your recommendation be to learn woodworking?
Start with softwoods, such as pine or poplar. These two are the easiest to master, then you can transition to hardwood.
Statistics
- Overall employment of woodworkers is projected to grow 8 percent from 2020 to 2030, about as fast as the average for all occupations. (bls.gov)
- In 2014, there were just over 237,000 jobs for all woodworkers, with other wood product manufacturing employing 23 percent; wood kitchen cabinets and countertop manufacturing employing 21 percent. (theartcareerproject.com)
- If your lumber isn't as dry as you would like when you purchase it (over 22% in Glen Huey's opinion…probably over 10-15% in my opinion), then it's a good idea to let it acclimate to your workshop for a couple of weeks. (woodandshop.com)
- Woodworkers on the lower end of that spectrum, the bottom 10% to be exact, make roughly $24,000 a year, while the top 10% makes $108,000. (zippia.com)
External Links
How To
How to stain wood
Staining wood refers to applying chemicals to wood's surface. This chemical reaction causes the wood to change in color. The wood will turn from white to brownish-red due to the chemical reaction. Although oak is the most popular type of wood to stain, there are many other types that can be used.
There are many options for applying stains to wood surfaces. Some methods involve mixing the stain with a solvent (such as turpentine) and then brushing or spraying the mixture onto the wood. Other methods use a solution of water and dye applied directly to the wood. Stains can also be mixed into paints and varnishes, becoming part of the finish coating.
Preparing your wood for staining is the first thing to do. The wood must be thoroughly cleaned to remove all grease and dirt. Sanding the wood removes scratches and imperfections. You must then decide on the type of stain that you wish to use. There are two basic kinds of stains: penetrating stains and non-penetrating stains. Penetrating and non-penetrating wood stains penetrate deeper than other types, making them perfect for dark colors like mahogany. Penetrating stains are best paired with lighter colors, such as maple.
After choosing the type and application method you prefer, gather your tools. Paintbrushes are great for applying stain because they allow you to evenly spread the liquid across the surface. After you're done painting, make sure to have some rags handy to remove any excess stain. If you plan to mix the stain yourself, make sure you have enough containers available to hold the different components of the mixture.
After you have prepared the materials, you can clean the area where you want to stain the wood. Use warm water and soap to clean away dirt and dust. Use a dampened sponge and warm water to clean the entire piece. Take care to remove all debris and dirt, especially if you are planning on staining darker wood.
Next, spray the stain. Start at one end of the piece of furniture and brush or spray the stain onto the wood. You should work slowly and carefully. Continue moving along the grain until you reach your opposite end. Be careful not to let the stain drip off the wood's edge. Let the stain dry completely before proceeding with the next steps.
Apply a clear polyurethane sealant to protect the painted surface. Apply three coats polyurethane sealer. Allow the third coat, which should dry overnight, to dry before sanding.