There are a variety of turning tools you can use in your workshop. The Bowl gouge is one example of a variety of tools that you can use in your shop. Others are specifically designed for specific types of wood such as walnut or oak. Here are some suggestions for choosing the right tools. Below are the most popular types of turning tools. Consider all options and decide on the best option for you.
Turning faceplates
Faceplates are a common tool in woodworking. These faceplates may be simple or more complex. Here are some examples. The trophy base has straight sides while the rosette has deeper beads and coves. Both require attention to detail. Learn more about faceplate turning.
The angle at the which a tool presents itself on the work will impact the cut. The cleaner the cut, the greater the shear angle. Although a square saw can be used to cut the wood, a 45deg angle produces a cleaner finish. Using a 45-degree angle makes the cut more shear and produces a smoother finish. You can enhance the appearance of your cuts by using a gouge and a sharpening stones.
Spindle roughing gouge
The spindle roughing tool is used to reduce square or rectangular spindle blanks into cylinders. Unlike the skew chisel, the spindle roughing gouge should not be used to turn bowls. Its cutting edge digs into the end grain. It can still be used for cross-grain tasks, such as turning bottle stopspers.
When using a spindle roughing gouge, you should avoid cutting the cross grain. This tool's geometry is 45 degrees. It is not recommended to cut across the grain. Problems can also arise from the flute shape and tool size. This tool is best used by someone who has a lot of woodworking experience. These tips will help you no matter whether you are a novice or a veteran woodworker.
Make sure you are using the correct angle. When using a spindle roughing gouge, make sure that you use the back hand to control the tool and your left hand for guidance. To clean up any dust, use your index finger. Next, make sure the cutting edge comes in contact with the wood. The shavings that are left behind by the cutting edge indicate the right position. You can now move on to the next step after the wood has already been cut.
Bowl gouge
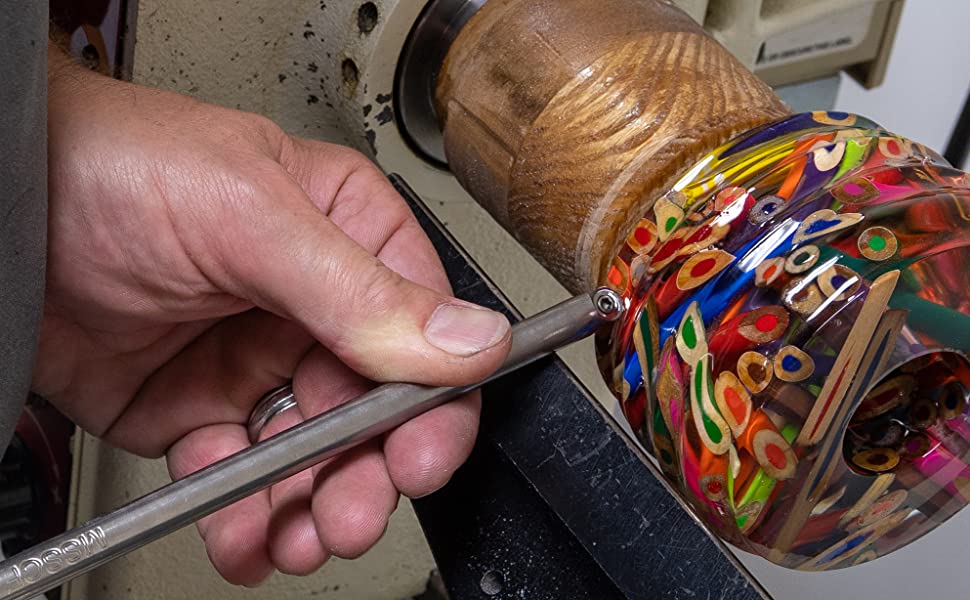
A bowl gouge is a high-quality turning tool that is used to remove material from the inside of a bowl. This tool features a brass ferrule and is made from high speed steel. It is necessary to adjust the tool's rest height to match the bowl shape before you can use a bowl-gouge. You can then swing the gouge handle back and forth until it reaches your desired depth.
You can find a variety sizes and shapes for a bowl gouge. For beginners, a bowl gouge with a diameter of about 1/2" is the best. For finishing cuts, wood bowl turners with more experience can use a 3/4" gouge. A larger gouge with a greater diameter can be used for large bowls, and can also be used as a plow. Different sizes of gouges will have different grind profiles. The area around the bevel that forms the cutting edge of a gouge is called its "cutting edge". Rub your finger against the gouge to check its sharpness.
Skew Chisel

To properly use a skew chisel for turning wood, you must first master the basics. First, you need to learn how to make taper cuts. You should use the heel of the skew's edge, and adjust the angle of the chisel's presentation to the spindle accordingly. Ideal for V-cutting and planning, as well forming beads, is a 20-30 degree angle.
You can quickly and easily cut V-grooves using a skew tool chisel to turn wood. To begin, position the toolrest high. Next, use the long end of the tool to mark the V-groove's centerline. Next, raise the handle to deepen the groove. Then, alternate the right and left cutting action until the desired groove depth is achieved. Once you have completed the cut roll the skew’s endbevel to the side.
FAQ
Can I make a living doing this?
Yes! In fact, most woodworkers already have it. According to the U.S. Bureau of Labor Statistics' (BLS), in May 2012 the median annual wage of woodworkers was $34,000 This is significantly higher than the national average, which is $31,000 per year.
What tools do I need to start as a woodworker and what should I learn?
Woodworking takes practice and patience. It takes time to learn how to use all the different tools and techniques required for woodworking.
There are many types of woodworking equipment on the market today. Some prefer to use power tools and others prefer hand tools.
It's your choice. But you should ensure that you pick the right tool. A basic set of hand tools may be enough for you if your skills are not yet developed.
A router is a tool that cuts intricate shapes in wood. You can also learn how to use it. These tools can be purchased at most hardware stores.
What is the minimum investment a hobbyist needs to make in order to get started?
If you're looking to start your own woodworking business, you'll probably need some capital to buy the necessary tools and supplies. It's a good idea to buy a small tablesaw, drill press and circular saw. These items aren't very expensive, so you won't break the bank.
How long does it take to finish a piece of furniture?
It depends on the size and condition of the furniture. A smaller project like picture frames or boxes can be completed in a single day. Larger projects, like desks or dining tables require several days. It takes time in order to properly stain or seal the wood.
Do I have to refinish my furniture?
Yes! There are many options for refinishing furniture that you don't need to hire a professional. Here are a few suggestions:
Use sandpaper for removing stains and scratches. After that, use a clean towel to wipe the surface.
Clear polyurethane varnish should be applied. Allow to dry completely before moving furniture.
Acrylic paint is a great way to paint furniture.
You can stain the furniture instead of using paint. The stain will give the furniture a rich look.
Shellac wax can be applied. Wax will protect the wood and add shine.
Is it necessary to be a genius in woodworking to succeed?
No. Woodworking does not require any special skills. You can create beautiful pieces of art by learning how to use simple power tools.
Statistics
- If your lumber isn't as dry as you would like when you purchase it (over 22% in Glen Huey's opinion…probably over 10-15% in my opinion), then it's a good idea to let it acclimate to your workshop for a couple of weeks. (woodandshop.com)
- Overall employment of woodworkers is projected to grow 8 percent from 2020 to 2030, about as fast as the average for all occupations. (bls.gov)
- The U.S. Bureau of Labor Statistics (BLS) estimates that the number of jobs for woodworkers will decline by 4% between 2019 and 2029. (indeed.com)
- Woodworkers on the lower end of that spectrum, the bottom 10% to be exact, make roughly $24,000 a year, while the top 10% makes $108,000. (zippia.com)
External Links
How To
How to drive a nails in wood
The first step in driving a nail into wood is to choose the correct size and type of hammer. Claw hammers include mallets, claw hammers (sledgehammers), mallets, ball-peen hammers, hatchets, and mallets. Each type of tool has its advantages and drawbacks. A clawhammer works best when hitting something hard like nails. However, it can sometimes be difficult to see exactly where the strike is going. Although a sledgehammer can be used to hit large areas quickly, it is too heavy to be useful for small tasks.
After selecting the right hammer, you will need to place your hand flat against one side of the head. The handle should rest comfortably in your hands. Take the handle and hold it with both hands. But don't press down so hard you injure yourself. Hold the hammer straight up, keeping your wrist relaxed. Then swing the hammer back toward the ground, aiming for the center of the nail. You should feel the impact of your hammer hitting the nail. You can practice swinging the hammer with a block or wood until you feel the rhythm.
Once you are ready to drive the nail, place the hammer close to your body. Position the nail, so it's perpendicular to the surface of the wood. Keep your attention on the tip. Swing the hammer forward, and then move the hammerhead. Repeat this action several times, gradually increasing the speed of the swing. Once you've mastered the technique, try adding power to your swings. You can hold the hammer over your shoulder and forcefully bring it down. This will help you put more energy behind each of your moves.
Once you've nailed the first hole, remove the hammer from the nail. The rest of the nails can be pulled out using a screwdriver, pry bar, or a hammer. To prevent splitting the wood, ensure you keep the nail heads flush against the board's surface.